
If you want your machine to stand the test of time, you must maintain it. The secret to successful sewing and quality work is a happy sewing machine and here we have some tips that will help keep it in working order?
Why Bother?
This might sound far-fetched but practically all problems encountered with a sewing machine can be traced back to the way the machine is looked after. Let the dust settle fail to oil the parts and fail to clean the machine after each use will lead to some serious sewing difficulties down the line. Incorrect tension, breaking threads and refusal to work altogether are all caused by a lack of TLC.
The Basics
Maintaining your machine is not a strenuous chore. You don’t need to be a specialist engineer to do the following – it’s all about common sense and a little bit of elbow grease!
Don’t Let Dust Settle
Machines hate dust. That’s rule number one. Dust will mess with the intricate parts of a sewing machine and stop the fluid flow of the thread. The one thing that you must always make sure of then is that the machine is adequately protected from dust. Use the cover that the machine came with to protect it when you are not using it. If you don’t have one of these, or if you threw it away, use a spare sheet or a pillowcase and wrap it around the machine.
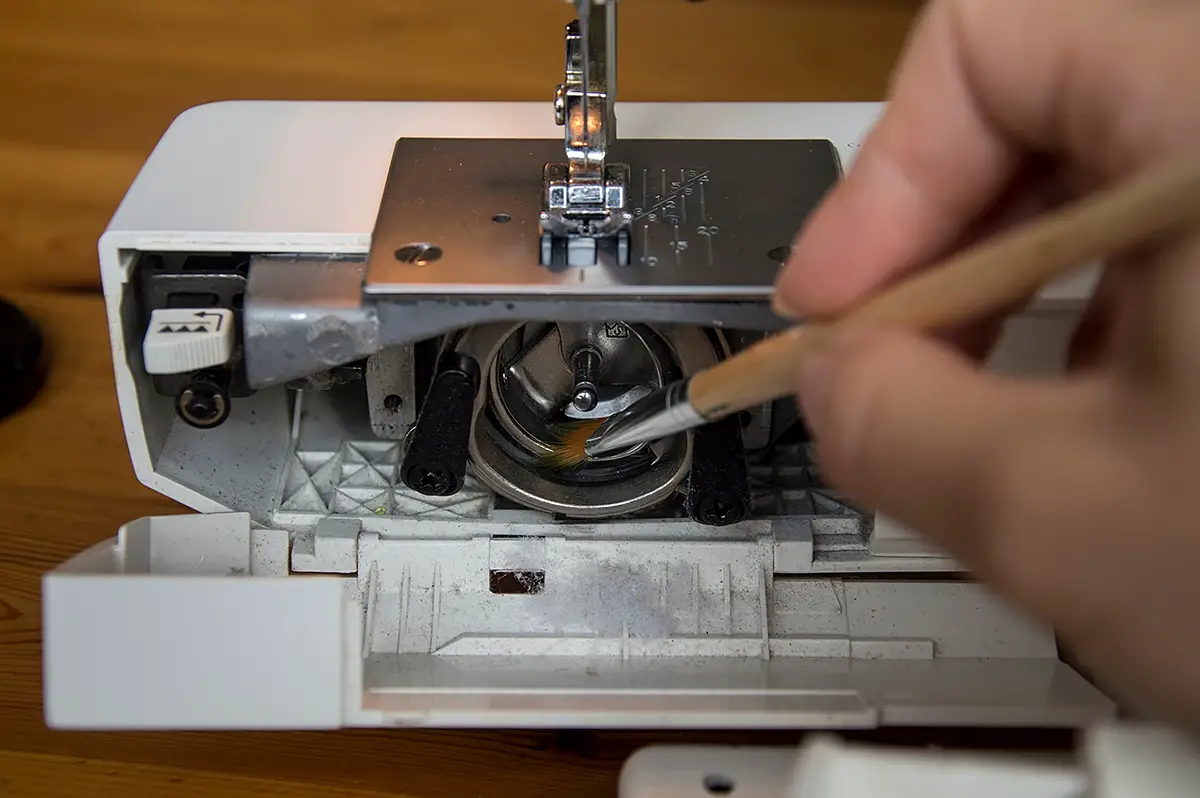
Cleanliness is Next to Godliness
Regular cleaning is an absolute must. After every sewing project, you should get into the habit of giving the machine a thorough clean. The manual will give you specific instructions for your model but there are some basic areas that you should make sure are spotless.
All you need for cleaning is some clean fabric – muslin is perfect because it is thin enough to get between the hard to reach areas. Compressed air cans – the type used to clean computer keyboards – are also perfect for this job and make it easy to pick us the stray dust, thread and hair.
Start at the top and work your way down the machine, tending to all the areas that matter. Tension discs tend to gather lint so make sure that they are free of any spare threads. Use a thin piece of fabric and place it between the discs, and move back and forth to gather the dirt. The bobbin case should be your next target. Take out the bobbin and using your compressed air can blow out the lint – you might be surprised by how much dust is lurking in here! The areas beneath the throat plate should be carefully cleaned. Never ever use anything wet around these areas. Even damp cloths are an absolute no-no because they can seriously affect the machine. Just use a clean, dry cloth and wipe carefully around the parts. The key to this technique is little and often – if you clean regularly there should only be a few bits of dust lurking here anyway.
Needle Changing
When you are in the midst of a sewing project it is important that you pay attention to the needle. Needles should be changed on a regular basis. For example, if you were undertaking a huge project and planned to spend at least a day sewing, that needle should be changed probably three times during the day.
Why do we bother doing this? The tension from the bobbin does, over time, affect the shape of the needle. During heavy sewing sessions, the needle will bend slightly and will be more prone to snapping off in the middle of a stitch. Prevention is better than cure and ensuring that you are using a fresh needle will eliminate the need to worry about this problem.
Recap
Maintaining your machine is really just a matter of taking a few minutes to wipe down the parts and get rid of that dust. We sometimes forget to do this but it really is a good investment. Your machine will live a long, happy life!