
If you are thinking about making your own lace masterpieces you must read our guide! Find out what tools your need and how to get started.
The Appeal of Lace
Lace is beautiful. It looks intricate and impressive. Until now you might have thought that creating your own lace patterns was completely out of reach. You’re wrong! All you need is the right equipment and some simple techniques.
The Materials
You can’t make lace without these essential pieces of kit. There is no substitute so take our advice and hit a haberdashery or crafts store for these items.
- Pillow
Item number one on your list should be the pillow. The pillow acts as your workbench and will be home to your bobbins and threads. There are a variety of shapes and sizes on the market and they won’t break the bank.
A traditional pillow is a dome shape, great for beginners and anyone making doilies because you can turn it around and adjust the angle you are working from. Another classic is the roller. The roller is normally recommended for anyone wanting to create edges and trimmings.
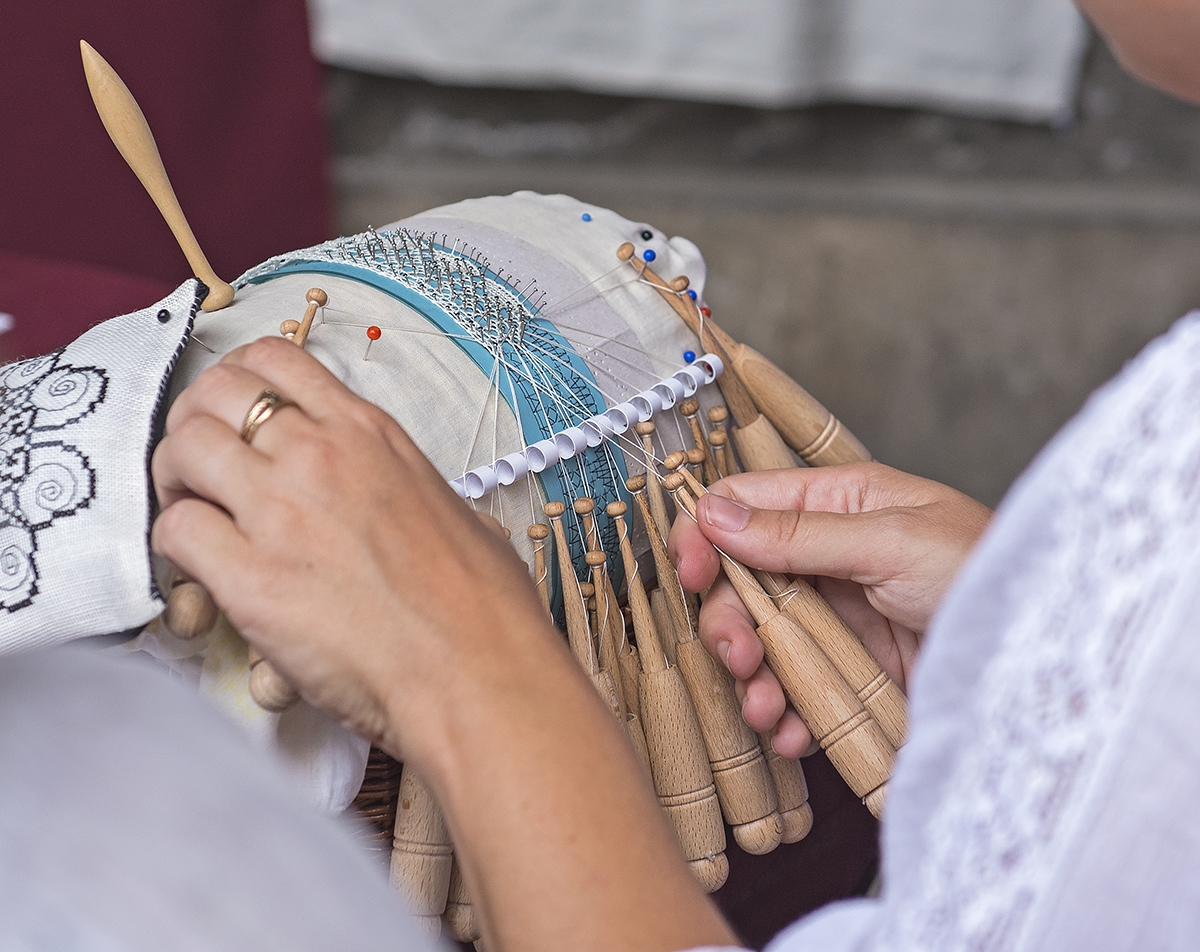
- Bobbins
Bobbins are essential. This is what you will move to create your lace design. They come in all colours and weights but all you need to know is that there are two types: the spangled and the continental. Continentals are short and are normally used for very intricate designs which will require frequent changes when lace making. The longer, more traditional looking spangled bobbins are traditionally used for repetitive designs, like trimmings. Think about what you want to create and purchase accordingly. You could cover your tracks and purchase both sets – that way you can create a complete item with the right pieces of equipment. However, bobbins are normally expensive so only splash out if you know that this hobby is going to last.
- Thread
Thread needs to be considered before you embark on your project. Lace patterns can be made with lace, simple linen thread or silk. This is a big decision.
Silk, with its fine thread, is hard work and only be tackled when you consider yourself a proficient and skilled lace-maker. Cotton, on the other hand, is easy to work with but it won’t give you the best finish.
Real lace thread comes in different finishes and is composed of different fibres. It will give you the overall best finish so once you have graduated from using cotton, upgrade to lace!
- Pins
You need some thin pins and you need a lot of them! These are not hard to come by and you will probably have some suitable ones knocking around your sewing kit. Just get your hands on one with small heads – this is what you will be sticking into your pricking paper.
- Pricking Paper
A lace pattern is pricked out on paper – this is the template that you will work on. The card itself is normally quite thick – the idea is that a pin should stick into it and that it can withstand the pressure of thread wrapped around it.
The special card is easy to find online or in specialist shops but if you are itching to get started, it is possible to use normal printing paper. In some ways, this is better because you can print out hundreds of patterns, which are available on the Internet. It might not be the best idea for beginners but for those who have an idea of what they are doing, go for it!
How to Lace
Once you have all the equipment in place – you need to learn how to actually lace. For beginners, this can be tricky but with a bit of patience, you will soon be in the swing of things!
- Get your pattern. A guide will show you where the pins should go. The pins need to prick out the pattern – i.e., create small holes.
- Wind your bobbins, these are always done in pairs. You take one end of your chosen thread and wind it around the first bobbin, at the top. Repeat on the second bobbin. At this point you need to decide how much thread you are going to use for the pattern and wind it around the bobbins accordingly. When you have decided on the length, wind the thread, making a loop and slip it over the top of the bobbin to make a simple slip-knot. Stick a pin into the pillow and hand the pair of bobbins from it.
- When you have a pair of bobbins hanging from each bobbin, its time to get lacing! Each stitch you make will either be a cloth stitch or a half stitch. To make a stitch you lift one bobbin over another.
- During stitching you may need to tighten the threads. You can do this by simply pulling down on each bobbin or you take each pair of bobbins and pull them apart slightly. Don’t pull too hard – you want tight stitches rather than broken ones!
- The easiest and neatest way to finish a piece off is to unwind some lace from the bobbins and cut the bobbins off. Then tie each piece of thread into a neat knot.
Recap
This has only been a short guide to lace-making. It is such a complex and detailed art but one that is definitely worth exploring if you want to create beautifully intricate designs.